With social distancing making it difficult to go out, here's a kitchen project that'll make your tummy really happy!
Sourdough… a trendy word in the world of bread, but you should know that sourdough is more than just a trendy food item. It uses wild yeast as a leavener, making it a fun kitchen experiment. But what's more? Sourdough packs immense flavour when compared to regular bread, and how you use your starter is only limited to your imagination. The best part? Sourdough bread is, traditionally, vegan! By the end of this article, you’ll know how to make sourdough bread entirely by yourself.
Like everyone else stuck in the lockdown, the rare excursions for groceries had me searching for yeast like my life depended on it. I figured making bread at home would help me kill some time while also being productive. It turns out, many other people had the same idea and there was ZERO yeast to be found in most supermarkets around where I live. So I made my own yeast… and you can too!
The only real difference between yeast and sourdough is that a sourdough mother starter is a wild yeast that is more resistant to acids, which means AMAZING things for flavour. Growing wild yeast only needs a few days and daily effort for all of… five minutes. The whole process of fermenting your sourdough mother starter and then baking some lovely crusty vegan bread with it is sure to fill you with a sense of pride and independence that could never come with your regular loaf from the neighbourhood bakery.
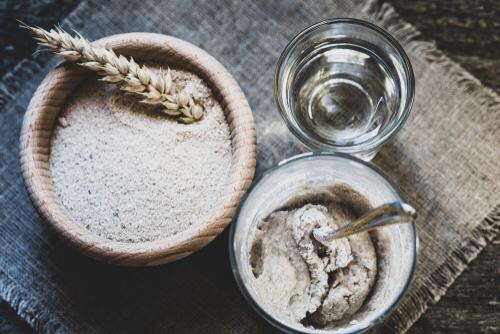
Here’s the full list of things you need to make your quick sourdough starter:
And that’s it!
The only other thing you need, as you start, is to decide what cup you will use for measurement and stick to it. Let's go!
Day 1
Grab a tall jar or glass container, you will need a tall and wide one so your starter has room to grow. Add 1 cup of whole wheat flour and stir in 1/2 cup of clean drinking water. Once you have a thick paste (you may need more or less water to achieve this). You're good to go! Cover your container with a damp tea towel and leave on the counter at room temperature.
Day 2
Check to see if there is some bubbling in your starter. If it hasn't happened yet, wait till day 3. If you see bubbling. Take 1/2 cup of the starter and discard the rest. To the 1/2 cup of reserved starter add 1 cup of flour (you can use all-purpose or whole wheat), and enough water to make the paste (this process is called FEEDING your starter).
Day 3
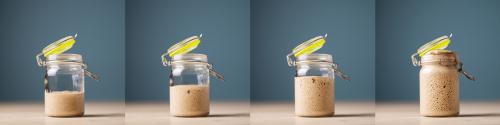
You should be noticing some activity and bubbling in your container now. This is a wonderful sign and means that your starter is well on its way. Repeat the process from day two of feeding your starter.
Keep an eye on your starter. If it seems too liquidy or appears to be sinking after being bubbly only hours ago, you can feed it again.
Day 4
Continue to feed your starter. Remember to discard ALL but 1/2 a cup of the starter which should be given the feeding of more flour and water.
Day 5
If you've been checking your starter every 12 hours and feeding accordingly, you should have a bubbly and active starter by now. Feed it for the day and bask in the knowledge that beautiful bread is just around the corner.
Day 6
Feed your starter one last time. This time, discard everything except for a 1/3 of a cup of the starter and feed as usual. Make a note or mark the level your starter is at when you have finished feeding. Within 4 to 6 hours your starter should double in volume letting you know it's ready to bake with!
If by day 6, you don't have a ready starter, don't feel too bad or discouraged. Your starter may just be a late bloomer due to lower temperatures. Keep feeding for a few more days. It should recover. If you need a break, you can store your starter in the fridge for up to a week and try again!
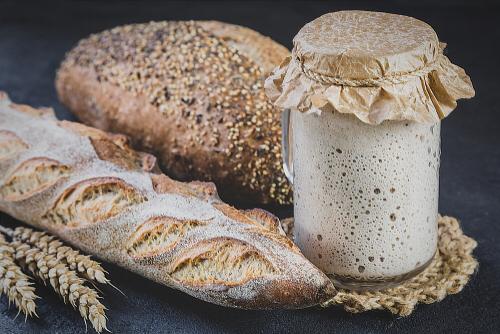
Once your starter is ready, you can use about 1/3rd of a cup to make some lovely bread and/or store the container in the fridge and feed it once a week following the same feeding method as before. A well-maintained sourdough starter can last for years if looked after properly!
You might be wondering what to do with discard, luckily there are plenty of vegan sourdough discard recipes that are sure to hit the spot and make this kitchen project worthwhile. There's a whole world of sourdough recipes for you to enjoy now: from pancakes to cinnamon rolls, the options are limitless. But to learn how to use sourdough starter to make brilliant bread that needs minimum hands-on time (leaving you free to binge on your favourite show and still have amazing bread to show for it) check out the recipe below!
No-Knead Sourdough Bread
This recipe needs an oven-safe dish that is round and deep like a dutch oven. If you don't have that, it's totally fine. You can use lower hydration to make it easier to work with and shape into freestanding loaves.
Ingredients:
- 4 cups of flour
- 1 and 3/4th cups of water
- 1/3rd cup sourdough starter
- Salt to taste
Method:
- Make sure your sourdough starter was recently fed. You can also use a starter straight from your fridge for a more sour flavour.
- Mix your flour with salt. You can choose to replace half a cup of your wheat flour with rye or any other flour.
- You can also add any herbs or spices you wish to add at this point.
- In a separate bowl, mix your starter with the water till it's all mixed in and then pour this mixture into your flour.
- Using a wooden spoon, stir till you have a shaggy dough. If your dough looks dry or you have used whole wheat flour or rye, you may need to add more water.
- This is a no-knead recipe so all you need to do now is cover with a damp towel and let it rest on the kitchen counter overnight. Make sure you take the weather into account. If it's hot, your dough will need less time (6 to 8 hours is plenty) but if it's cold out, then you may need longer.
- Check on your dough to make sure it's doubled and springy to the touch.
If your dough looks flat, it may have over-proofed. So make sure to check your dough more than the clock. To avoid over proofing, you can leave your dough in the fridge for at least 24 hours to rise more slowly. However, this will develop a lot more flavour in the bread and depends on your preference for sourdough.
- Stretch your dough with wet hands. To stretch, grab the dough and lift it up. It should stretch straight up. To fold, place the end you pulled up on the opposite side of the bowl, then turn the bowl and stretch again. You should do this two or three times before transferring into a bowl lined with parchment paper for shaping. The bowl should be a similar width to the final baking container that is heating in the oven.
- Now your dough has one last rise. Get your oven preheated as hot as it will possibly go and put the container you are baking in into the oven to heat up as well. Let the oven heat while your dough is rising one last time.
- After an hour, lift the parchment paper from the proofing bowl and put it into the very hot baking container.
- Grab a VERY sharp knife and make cuts (scoring) in any pattern you like over the top. A cross is always classic.
- Cover your container and place in the oven for 20 minutes. Post this time, take the lid off and let it bake for another 15 minutes or until your loaf is deeply golden brown.
To double-check that your loaf is done, flip it upside down and gently knock the base of your loaf, you should hear a hollow sound.
 Remember to let the loaf cool a bit before you slice it!